Cooking, Cabins, Crafts & Careers

FIND NEW POSTS AT www.ChestnutGroveStudios.com/blog

Archive for the category “tiny house”

Art Studio Reveal

It took longer than we thought, but it is complete and functioning.  Early last month, hubby banged out the framing, and then we covered the exterior of the walls with plywood.  We had the lighting and outlets installed, and then it was ready for me to put in the insulation.  That all went pretty quickly, and without any hiccups.  YAY!  (Check out the previous blog post for details.)

We debated over doing that nasty drywall work ourselves, or hiring it out.  In the end, we hired it out – thankfully.  There are just some building tasks I have learned that I do not enjoy doing, and am not very good at… drywall being one of them – laying tile another.  So, by mid-April the drywall was in, and the ball was back in my court.

The next task to be tackled was the painting.  I chose Valspar’s Summer Gray for the walls and ceiling to have a “blank canvas,” so to speak, for hanging artwork.  Since the floor was also just plywood sheets, I wanted to paint a checkerboard on the floor, and used the same Summer Gray as the walls and Sherwin Williams’ Mindful Gray.

The checkerboard floor was a fun little project – it is a bit trickier to paint it on the diagonal instead of just going straight across parallel to the wall, but I like the effect much better.  The steps were:

  1. Paint the entire floor the lighter color (Summer Gray).
  2. Find the center of the room using a chalk line, then measure and mark the locations of the squares.  The area of the room is 8×12, and I chose 22 inches as the length of the sides of the squares.  There was no special formula to find that number, but I did go thru several “to scale” drawings before I found a size that I felt gave me enough squares to make an impact.
  3. Using painters tape, tape off the outside edges of every other row of squares to be painted gray.  This was so I would not have to go back and free-hand paint any edges.
  4. Paint initial pass of gray squares, and remove tape.
  5. Tape the outside edges of the remaining squares to be painted gray.

Remove remaining tape, and top with a couple of coats of polyurethane.With the flooring done, I passed the baton back to hubby to install the door, and do his special woodworking thing to craft some window trim.

While he worked on those items, I got busy trying to find a way to economically heat and cool the room as well as have access to “running” water.  It took a bit of internet searching, but I finally found exactly what I needed.

For heating/cooling AND dehumidifying, I chose this Black & Decker Portable Unit.  It vents out of the window and does not require any duct work.  So far, it is working like a champ, and I am very pleased.


I only need to have water on hand for a quick clean-up of a paint spill, to fill paint water jars, and for a preliminary wash of brushes until I make a trip to the house for a proper washing.  I found this portable “camping sink.”  It holds 4-5 gallons of water.  It has a foot pump that you press once to dispense about 1/2 cup of water, and even comes with a towel holder and soap dispenser.  The waste water drains thru a flexible pipe and into a bucket.  It also is working perfectly for my needs.

For storage I repurposed a variety of bins we were not using… they are different sizes and materials, but they fit the budget, “free.”  And making labels with my Cricut machine tied it all together.

Craigslist provided a source for a vintage sewing cabinet.

Goodwill shopping allowed me to snag an $8 bookshelf, and hubby had a work table he wasn’t using that I use for my primary work surface.  A plant, some lamps, and a few other items, and the studio is officially open!

This slideshow requires JavaScript.

Now to get busy creating… upcoming art class I am teaching this month, and an art show I will participate in next month.


Small House – January Update

This past month we have been focusing on wrapping up some of the interior finishing work that needs to be done… primarily, the window casings.  Just as we have done with most of the design decisions for the small house, we incorporated a craftsman-style to the look of the finished project.

The keys to craftsman-style are clean lines and balanced proportions.  Just like every other part of building this house, there were key “terms” to learn so that I could understand what hubby was talking about when discussing the construction, or helping with the installation.  My cheat sheet showing all of the parts and how they fit together:

window-9

We turned to Fine Homebuilding for some tips on the proportions:

  • The thickness of the cap is the same as the stool (ours is 1 inch)
  • The stool should be 1 inch thick and project out 2 inches
  • The side casings should be wider than 3 1/2 inches (ours are 4 inches)
  • The overall height of the cap + frieze + fillet should be about 1 1/2 times the width of the side casing – (ours is 7 inches – 1 3/4 times the 4 inch casings)
  • The apron height is similar to the width of the side casings (ours is 4 inches)

We chose walnut we had in our supply at the shop to bring in a cozy feel, and to match the walnut floors we had installed throughout the house.


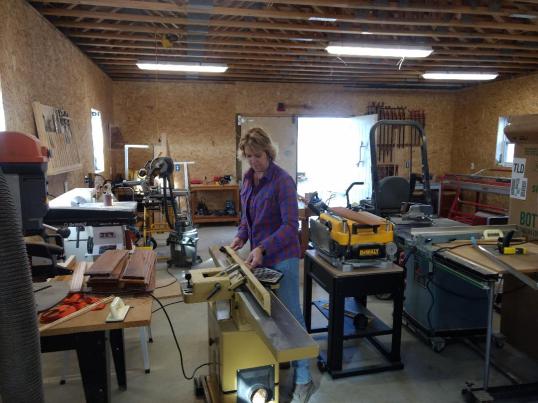
I think hubby really enjoyed this project because 1) it was inside work during December, and 2) he got to use all kinds of power tools in the shop.  After selecting the best pieces of walnut, he first cut pieces to their rough length (miter saw), and cut out any imperfections in the large pieces of lumber.  The second step was at the jointer to create a smooth, flat surface on the face of the wood. and then run that flat face against the fence on the jointer to square up the edge.  The table saw is where the next piece of action takes place, and that is to rip the pieces to width.  My favorite tool (planer) to watch comes next, and that gradually trims the pieces of wood to their desired thickness.  The pieces are then back to the miter saw to cut to their exact length.  Finally, because the milling process leaves sharp edges, he used a 1/8 inch round-over bit in the router to soften the edges.  The drill press also comes into play on faces of the apron, frieze and casings to bore out holes to accept the screws for mounting.  An 1/8 inch scrap wood is used to cut out plugs for hiding the screw that are countersunk into the holes once the pieces have been installed.

window-5

So in the blink of an eye, we went from this undressed window –

window-6

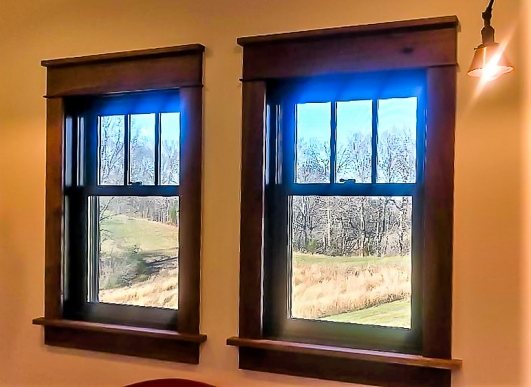
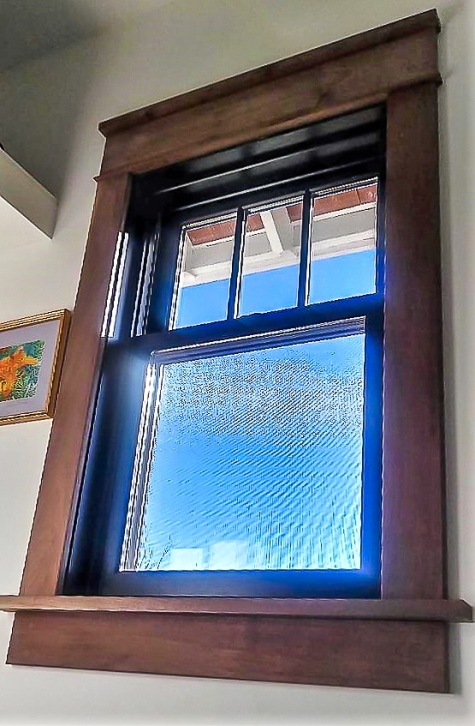
to this beautifully finished craftsman-style custom walnut casing.

window-7

I think they look great against the black window frames.  We will trim out the front and back doors exactly the same way as the windows with the head heights over the doors matching up with the head heights of the windows.

Here’s the one in the bathroom – the lighting is a little different.

window-8

Small House – November Update

small house bday

SMALL HOUSE – BIG HAPPINESS  — That just about sums it up!  Hubby was channeling his creative side and gave me this t-shirt and necklace for my birthday last week.

So another month in and “we” have checked off a few more items from the to-do (aka honey-do) list.  While the kitchen faucet was a big one… LITERALLY!  1539389713738

Getting the shower doors installed so that we could hook up the steam shower was, as my granddaughter puts things, “life changing!”

(Notice the nice teak seat hub also gifted “us” with on my birthday.)shower doors

The steam shower even has “an app for that.”  I can be down at the workshop painting or scavenging thru the storage bins upstairs for items to put in the booth at the antique mall, and think, “oh, a steam shower would be nice…” open up the app on my phone to turn it on, and BAM!  by the time I walk up to the house – that bad boy has already fogged up the shower doors.

Other semi-critical items on the list have been the front porch steps.  Right now the temporary treads are on, but by the end of the week, we will have installed the permanent ones to match the front porch flooring.

The kitchen countertop that hubby hand-crafted is also installed, and it just looks amazing!  It brings in a warm and cozy feel, and keeps with the craftsman style we have woven all throughout the building and designing processes.

So far we have been spared a frost to kill the plants, so we still have wildflowers blooming along the drive.  This weekend they are getting some new friends planted close by now that all of the big trucks are no longer coming in and out.  Even the barn is getting some landscaping started.  In the mix are Dawn Redwoods, Hemlocks and Rhododendron.

We may wrap this project up over the winter months since almost all of the remaining projects are on the inside –

Love grows best in small houses

With fewer walls to separate.

Where you eat and sleep so close together,

You can’t help but communicate.

And if we had more walls between us,

Think of all we’d miss.

Love grows best in small houses

JUST LIKE THIS.

                 author unknown


Small House – October Update

I have to say – 1 month in – 600 square feet is pLeNtY for us!  Even with just a curtain on the bathroom doorway.

I was so worried that once we got moved in, we would slow down, but we have NOT, at least Hub has not!  So what have we done?

Installed the kitchen cabinets!  YAY!  And temporary countertops out of partical board so we have that ever-important horizontal surface to collect things that will go on the yet to be installed shelves.  There are still a few exposed wires for the under-cabinet lighting, but we are getting there.

With the cabinets came the hard chore of selecting the hardware.  I wanted to mix and match the knobs and pulls.  I mixed four, if you can believe it, knobs and pulls in my tiny kitchen.

Some black knobs and twisted pulls on the drawers, some glass knobs on the doors, and a couple of copper finger pulls on either side of the stove to connect the copper lighting with the cabinetry.  I think it works!

A preview of the countertops…oct blog - counter2

Hub has been working hard combining reclaimed 100 year old long leaf pine flooring with some walnut we have had curing up in the top of the barn…  oct blog - counter.jpgHe even routed out a drainage board into the countertop to the right of the sink cutout.  We have to do numerous coats of Waterlox before we can install it.  We also have something special planned for the countertop to the right of the stove – hoping to have that complete next month as well.oct blog - shower

We were able to get the shower components installed, so no more outdoor showers, but we are waiting on the custom glass shower doors that will enable the final install of the steam shower… another item to check off during the next month.  It works having a 4 ft by 4 ft shower, so having no doors/curtain does not keep us from taking a rain shower, or using the massage wand.  SwEeT!!!  And it is HOT… and it has plenty of PRESSURE.  The BEST SHOWER I have had in my own house in TWO years – wait EIGHTEEN years.  As a married couple, we have never had a shower this big or with this much water pressure, (the important things, right?)

In the garden – well we have pulled up the watermelons and planted a fall garden, Brussels sprouts, cabbage, lettuce, kale… oh wait, rabbits love that stuff – so for now, we still have kale and lettuce.  I’m thinking they must be working their way down their favorites.  I cannot imagine anything will be left after another week.  At least we are sustaining the wildlife… the ill-fated corn field to the deer and now the fall garden to the rabbits.  But we do have figs!  I am not sure they will ripen, but we are hopeful.oct blog - figWe incorporated a metal sign I had made for our anniversary into the back deck rail where we watch some pretty amazing sunsets.

oct blog - rail


oct blog - sunsetWhat is not fun – sTiNk BuGs!  We had them at the rental, and we have them now, but they are NOT inside this house because of the awesome insulation we did with Columbia Crawlspace.  For that, I am very thankful… but ladybug season is just around the corner.

Now that I/we are not consumed with construction chores, we are exploring new things… I am back in my weekly Creative Spirits painting class.  And this weekend you can find me at the Fly Pack Rat Sale.  I’ll have lots of extra stuff from moving and many of my Tennessee Church and Barn Series original paintings… PicMonkey Collage 2018 Barn Series - gridnotecards from paintings… kids Halloween t-shirts, oct blog - shirtsfurniture, books… and more!

I hope you continue to follow our journey – we’ve got more fun stuff ahead!

Small House – September Update… Moving Day!

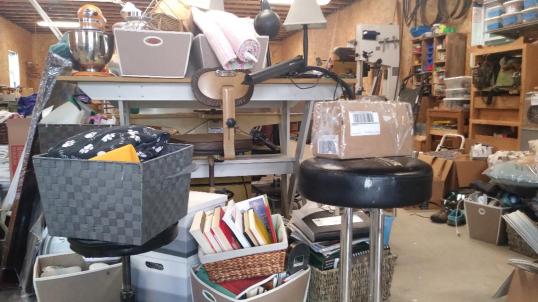
We are officially occupying the small house!  Finally!  What a chore it is to move, even though we just moved a couple of years ago when we sold our home in Nashville and moved to the rental close by the construction site.  This is how just a small portion of the end of the last day of moving looks at the workshop.Sep blog 9g

Poor patient hubby has let our hoarding invade his workshop.  It is almost embarrassing the amount of stuff we have.  There is one major garage sale coming!

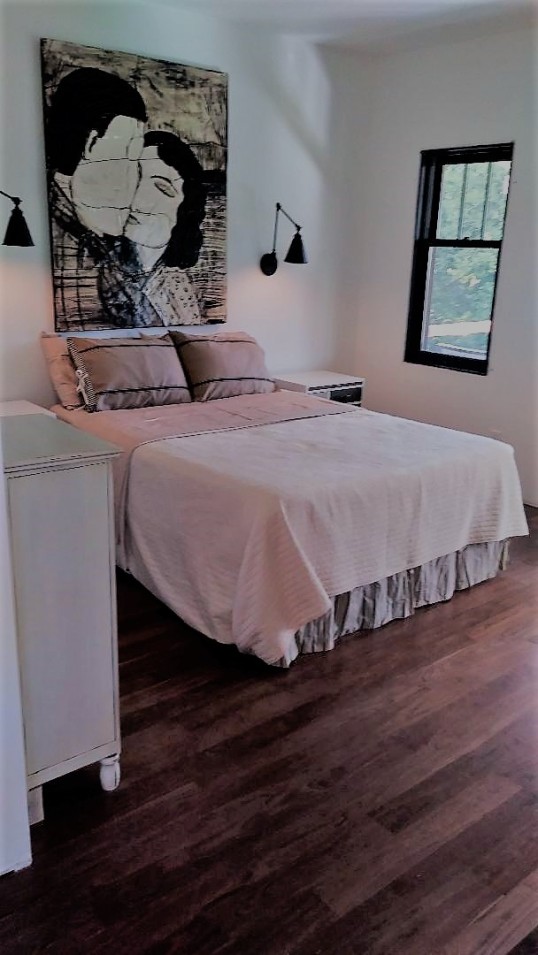
Sep blog 4The first room ready is the bedroom, including art on the wall.  I bought this tile structure in 1996, and it means a lot to me.  It weighs at least 80 pounds.  The artist is Polly Cook.  I love many things about it – the sepia tone, how the intended cracks in the tile create the face of the male figure.  It was my first “art” purchase.

What’s finished?

  • Wood floors installed (see above bedroom picture) – Walnut 4″ tongue & groove
  • Bathroom sink & toilet are functional (critical components)
  • Washer & dryer installed (no pic yet… there’s too much laundry)
  • Rods and shelves in closet (no pic yet… there’s too much chaos)
  • Heated floor in bathroom – there were multiple tests involved in this install to validate the 10 year warranty – i.e. I had to purchase a multi-meter and understand Ohms, let’s just say, the tile work was much more complicated
  • Refrigerator moved from the workshop to the kitchenSep blog 9b

What’s in progress?

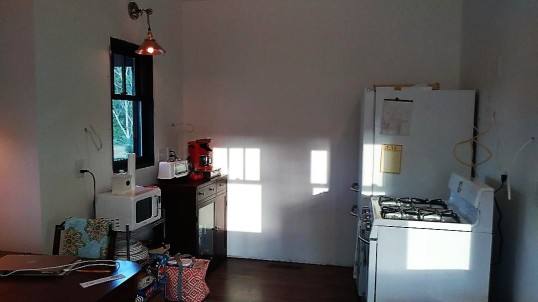
  • Installing the gas line to hook up the range (current cooking options are outdoor grill and microwave)
  • Tile work in the shower (outdoor showers with the hose are invigorating, but I’m looking forward to that steam shower)Sep blog 9h

What’s next?

  • Kitchen cabinets
  • Baseboards
  • Interior doors (bathroom and closet/laundry room)
  • Steps to front door
  • Rail on back deck
  • Landscaping

Showers tonight were compliments of the gym we belong to; however, showers earlier this week were compliments of the hose-pipe!  I have not slept better in any other house than the house that we built!  More to come…

Small House – August Update

It’s official – we have given notice to the landlord… I have written the LAST rent check!

insulation day 2We started the month like this… pretty scary – it was insulation day.  We insulated the barn/shop ourselves, but we hired it out for the small house.  We used Columbia Crawlspace, and I highly recommend them.  EVERY nook and cranny has been covered with a hard spray foam – 1 inch on the vertical walls in the living spaces, which are then covered with the normal bat insulation.  The roof/attic space as well as the crawl space underneath are spray foamed with the hard coating at 3 inches thick.  The temperature between the attic and the crawl spaces is said to not vary more that 4 degrees than whatever we set the thermostat on in the house.  SWEET + no critters/bugs coming in thru the cracks!

Take that Lady Bug Nation!

Next was drywall day!  Woohoo!  We were both a little intimidated about how we might feel after there were WALLS in the small house.  Would it be too small?  Would the ceiling lines be too cut up?  Would everything close in on us?  It did not.  Thank Goodness, in fact it looked more open after I/we put on 1 coat of primer and 2 coats of paint – all white of course – because white makes everything seem bigger, (like your butt and your legs)…

Then the light guys came back and put in all of our sweet fixtures with copper to carry out the theme from the outside in.  Most of them are custom from fine crafts-people on Etsy.  The materials are mostly oil rubbed bronze and raw copper.

Aug blog 6

Above – is oil rubbed bronze reading lights in the bedroom.

Aug blog 8

Custom wall sconces for the eating nook on either side of the window.

Aug blog 01

Single wall sconce over sink with bronze and raw copper.

Aug blog 94

Another view of the eating nook with the sconces mounted.

Next is the flooring.  It is 4 inch walnut, tongue and groove throughout… right now it is “curing,” but installation starts tomorrow!  I am soooooo excited to see this beautiful wood go down.

Aug blog 3

The bathroom is the last INTIMIDATING project – tile, ugh – it should be fine, (according to YouTube), but whew, making tile stick to the ceiling seems a little daunting.

And so here we are… 30 days from sleeping in a new bed, in a new house.

Don’t worry, it won’t be finished, so there will be more updates as we put up the rails on the porches, trim out the doors and windows, put together and install the kitchen cabinets… the list goes on.

Below is where we were a year ago, and where we are now!


Small / Tiny House Update – April

2018-03-31 FRONT PORCH ROOFMARCH MADNESS BABY!  WE KILLED IT!  No we didn’t have a perfect bracket, nor did we have Sister Jean, but we had some no-rain days, and got a lot accomplished.
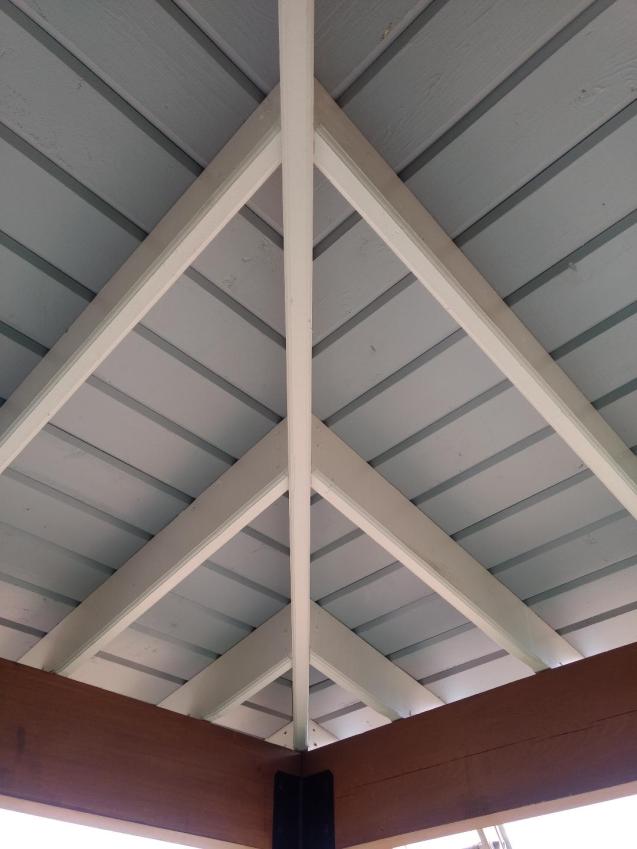
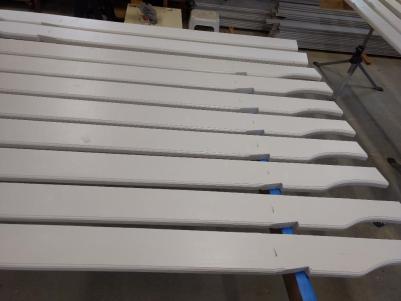
May I first bring to your attention the beautiful front porch roof joists and decking… I mean – it is amazing, right?  Well maybe amazing if you knew:

  • how many times I got on top of it,
  • each board was:
    • jointed to square one edge
    • ripped to make them a consistent width
    • routed to make the edges interesting
    • painted with two coats of primer and paint
      • Why is the porch ceiling blue?  (From Gun & Garden magazine July 2015 issue), “So is the tradition of painting a porch ceiling blue. Some say the idea stems from the notion that blue porch ceilings prevented insects and birds from nesting. But more often than not, the color is attributed to the story surrounding the Gullah/Geechee shade known as “haint blue” and its influence on American design over the centuries.”  Our shade of blue is Sherwin Williams “Morning Fog.”
  • how incredible it is that hubby got all of those joists perfectly positioned,2018-03-31 front porch roof under side
  • a hip roof (the part where the angles all come together in the above photo is one complicated piece of construction (and apparently one bathroom steam shower salesman in Spring Hill didn’t think we were capable after we had already done it, and judged us by looking at us when we walked in the store looking to purchase a couple thousand dollars of supplies for our steam shower – I won’t dog him on my blog, but let’s just say my tongue is an inch shorter because I did want to tell him, “yes, I not only know what a hip roof is, but I built one, which is more that you can probably say AND having a hip roof on your house has nothing to do with whether or not you can put in a “simple” square box shower that you are selling, (or not selling to us).”
  • the ends of those rafter tails are pretty amazing in the light and cast some amazing shadows, not to mention add to our craftsman themeporch roof joists 02-2018
  • I caulked each one of those joints on the top, even though there will be felt and a metal roof on top… because, that’s just what you do when you are doing it for yourself

There was also a lot going on inside:

  • plumbing rough-in has begun,2018-03-31 plumbing washer
  • running underground electricity to the house has started, (although the day after we dug the trench, it turned into a canal)2018-03-27 canal
  • an interior bathroom wall was moved out 16 inches.  (This is something you can do when your are building it yourself and not add hundreds of dollars to the cost.)  However it’s a 20% increase on the size of the bathroom – which basically means our steam shower is 75% larger – WOW, that sounds awesome, right!  Well it is awesome when you are going from a 3 foot by 3 foot shower to a 4 foot by 4 foot shower!  Maybe not so awesome by some standards, but put some tape on the floor – stand in a 3×3 space, and then a 4×4 space… it probably will save you us a few elbow bruises.

Back in my October update I mentioned a few visitors to our humble dwelling, well now we’ve got dogs for days.  We’ve got “white dog,”2018-03-27 white dog  “brown dog,”brown dog.jpg and “black dog.”2018-03-27 black dog  “Black dog” is HUGE – like his head above my waist huge.
“They” are really cute UNTIL they (“they” is only white dog) starts digging up hubby’s watermelons.  So starting today – when the doggy train shows up, I walk them back home – no more treats for the digger and, unfortunately, his buddies cannot hang out either.  Because, as soon as I plant “my stuff,” I am going to be a lot more passionate about white dog up to her shoulders in garden dirt!  I cannot show the actual digging picture because there may or may not have been tears involved, but “white dog” was up to his shoulders in dirt.  Lucky for me, I go by the “do not plant until after April 15th rule, so my plants are still trying to survive in their mini trays.

Now the really, really hard part… picking out tile, flooring, lighting… follow my boards on Pinterest, and comment, please.

P.S.  So I have also been corrected that technically, a “tiny house” is 400 square feet or less, so since our “small house” is 600 square feet, I need to stop referring to it as a tiny house, (plus it is not on wheels).  So from here on out – “tiny house” will be referred to as “small house.”

Tiny House – March Update

Wow!  We had ONLY 10 days in February without rain.  Given, we work 7 days a week, that wasn’t even two weeks of work on the tiny house!  UGH!  Let me repeat… UGH!  Luckily for me, I was doing the 30-in-30 painting challenge, and I got 27 barn paintings completed, but that’s basically another month of rent we are going to be paying because of the loss of time.  (See end of post for update on barn paintings.)March update 1

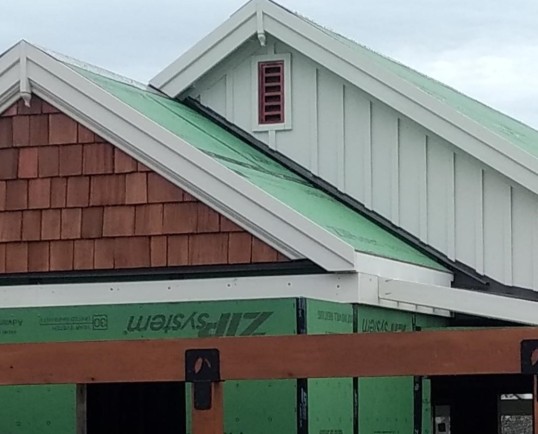
The GooD NewS my friends, is that we are “dried in,” well – all-but — the interior work can soon begin – just after a few “small details”

  • cut down the wall on the breakfast nook, (where the missing window is),
  • install the front porch roof, and
  • install that last window

We did accomplish a lot, given we had around a dozen days, working in and around the rain.

Checklist:

  • Finish installing roof sheathing over front gable end
  • Obtain, stain and install cedar shakes on front gable end #1
  • Router, cut, paint and install trim boards on front gable end #1
  • Manufacture, paint and install finial on gable end #1
  • Paint and install cement board on front gable end #2
  • Paint and install cedar battens on front gable end #2
  • Router, cut, paint and install trim boards on front gable end #2
  • Manufacture, paint and install finial on gable end #2
  • Begin installation of front side porch roof joists
  • Prime and paint right side roof joist tails
  • Begin installing cedar shake cover on right side soffits
  • Router, prime and paint one third of the front porch roof boards

Hub did an amazing job on the gable end trim!  March update 2

There are a lot of pieces going into making those triangles on the gables work PERFECTLY!  He is amazing at his craft, and even more amazing at being patient with me.  Just with the questions, and teaching, and LETTING me do the work instead of just doing it himself.  Some days, he struggles trying to keep me busy, but then, he lets go, and lets me do a task he might much rather be doing himself, like jointing wood…


jointerSome of the fun I got to have this month was learning to use the jointer.  I’m jointing some of the leftover cedar shakes to use on the soffit.  (I secretly think dear hubby has really started “training” me  on the power tools because we are getting closer to being able to actually start making mandolins and banjos in the workshop.)

“We,” (really hubby), took time out, (a lot of time actually) to build two new raised beds for our second year garden.  They are right in front of the house, so I can look out of the kitchen window and see how things are growing.  He decided a dedicated watermelon bed is a good idea, and then I can plant whatever I want in the second bed, as long as it is not tomatoes.  The two beds from last year are dedicated to blueberries and blackberries.March update 4

Of course some days, there are tasks I don’t really want to do, but I do like to continue to invest in the “we did this” account.  The tasks like shoveling dirt into the really awesome raised beds, or painting the ends of the roof joists, or painting the cedar battens, or painting the blocking on the back porch roof, or painting the front porch roof boards.  Get it… he must think I am really good at painting, or he really hates it!

Final note… the 30-in-30 painting challenge.  I painted 27 in 30, which is an improvement  over the 23 in 30 I painted last September.  September’s topic was Tennessee Churches, February’s topic was Tennessee Barns.  PicMonkey Collage 2018 Barn Series - grid.jpg


Tiny House – February Update + 30-in-30 Part 2

Here is where we are at the start of the eighth month.porch beams 02-2018

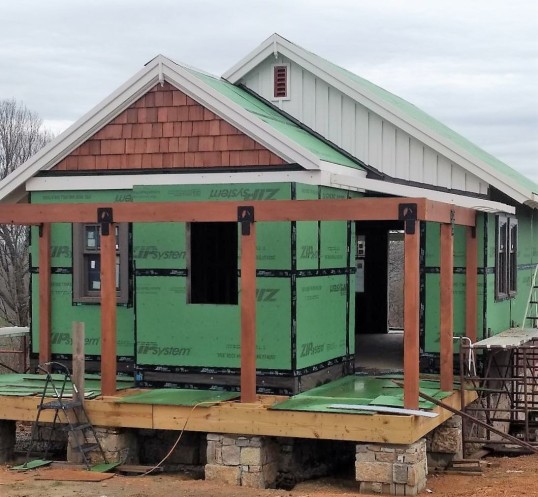
The front porch posts and beams have been installed.  We used Western Red Cedar and stained it a natural color.  The triangle above the porch, (gable end), will be finished out with handmade cedar shakes that we are waiting on from the Amish shake-maker to tie it all together.  We wanted something special for the metal t-brackets that connect the posts to the beams, so I trusted my best friend Google to help me find just the thing.  t-bar 2018

We decided it would be nice to try to tie in the location to the design theme.  Our property is located on what is called Chestnut Ridge, so I sketched a couple of chestnut leaves and sent it to Cutting Edge Metals.  They forged these pretty awesome t-brackets (and square head screws) to “beautify” our structure support system for the front porch.  And like everything else we seem to lift into the air, they are hefty – about 20 pounds each… and that 20 foot beam going across the top is also one solid piece of lumber, weighing in at around 100+ pounds.


porch roof joists 02-2018

The weather is still refusing to cooperate more days than not right now, so we have been working inside the workshop on painting chores – like the roof joists for the porch – 2 coats of primer – 2 coats of paint – 6 edges – it keeps a girl busy for a few days.  Hubby routed out a special trim edge on the bottom sides to make the painting more interesting (time-consuming) for me.

raised beds 02-2018Hub doesn’t seem to mind the weather as much as I do, so he has been keeping busy building some new raised planting beds for the spring.  They are conveniently located right between the house and the workshop.  I cannot wait to get some watermelons, peppers, herbs and more started in these beauties!

Standing guard over the fruits of our labor will be a bluebird family we hope finds its way to their new home that hub crafted and installed.  Note that no bluebird house is complete without a little engraving…


Another cold and rainy day project he completed with our oldest grand-daughter.

As for me, I joined the second 30 paintings in 30 days online challenge sponsored by artist Leslie Saeta.   The last one in September, I chose to paint rural Tennessee churches.  This time around, the subject matter is barns.  Here are a few of the completions so far.


You can see all of the churches and follow along on the barns on my Instagram page.

Tiny House – December / January Update

Baby steps and bad weather… that sums up the work for the last two months.  No more low hanging fruit… now it is big ticket items, like getting the roof on and windows in.  These are days requiring patience, attention to details, and a safety harness.  We did spend Thanksgiving in Savannah with our son, one of our daughters and one of our granddaughters… and there was a break at Christmas… and rain… and snow… and bitter, bitter cold to slow us down.  However, if all I have to complain about is a cold rainy day that keeps me from climbing on top of the roof to work, I am one lucky girl!

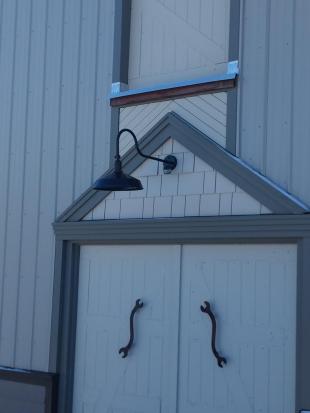
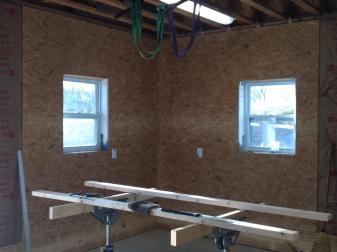
So what has happened in the last couple of months?  Well, a lot in the workshop – we have the wiring done… meanfarmhouse light.jpging outlets and overhead lights installed and inspected, and these beautiful bronze farm lights outside…  Also the insulation and wall-boards are up on the inside (this is what we did to pass the time on the rainy days).2017-11 barn interior


roof 12-4-17-2


As for the tiny house, the roof sheathing is FINALLY complete!  What a tedious chore!  Roofing is a career path I am glad to have bypassed.  We thought we had someone else doing the high-wire act up on the roof, but that didn’t pan out as quickly as we thought it would, so we just started doing it ourselves.

2017-12-10 roofing 3


Is it fun?  NO.

Is it easy?  NO and NO.

Is it done?  YES!

It all gave a new perspective to James Taylor’s song, “Up on the Roof.”


Now, it is on to the windows… Fun and easy, Yay!  We are keeping with the craftsman / cottage theme.  These are by Andersen, and they are going in great.  So far we have 5 of the 7 installed, but need to complete the front porch roof before we can install the 2 kitchen windows on the front side of the house.

2018-01-15 windows 2

We spent today, (hopefully the LAST snow day for this season), exploring the Amish community in Ethridge Tennessee looking for cedar shakes to install on the gable roof at the front of the house, cedar battens for the exterior siding, and a cedar front door.  We scored two of the three, which made for a pretty productive trip.  We will return in a couple of weeks to pick them up, so I hope to have an update on those in the next post.  (Still looking for a front door.)


All in all, we are still moving forward, and some day in the not too, too distant future, one of our dreams will become a reality… to be living in a house we built with our own hands.  How cool is that?

Until next month…2017-12-10 roofing 1

Post Navigation